Photographing sculpture can be tricky. On the one hand, you know that stunning photos of your sculpture, ceramics or other three-dimension art is key to a successful art business. Whether you want to sell your art on your website, via social media or at craft fairs and holiday markets, you’ll need digital-friendly and print-worthy photos that do justice to your sculptures, ceramics or other three-dimensional works.
But how can you capture three-dimensional objects using a 2D technology? Plus, you may not be ready to invest in a professional photographer, studio or pricy equipment. Finally, who has the time to learn the ins and outs of photographing large or multi-faceted works of art?
Fortunately, taking beautiful photos of your sculptures doesn’t require models, a massive budget or years of expertise. In fact, the rules for getting the best photographs of sculpture are different from those you’d need to follow for painting or small objects such as jewelry.

Professional-quality photos have never been more important for showcasing your artwork to potential buyers. More and more art lovers buy online. And even for those who shop in-person, beautiful photos on your website and in your marketing materials lend credibility to your work.
Follow Artweb’s expert advice on photographing sculpture at home or in your studio with just a few household items and a shoestring budget.
Getting started
Imagine an art collector browsing in a gallery or shop. First, they would walk around the item that’s caught their attention. Then, they would examine it close up to admire texture and detail. Finally, they might stand further away to see the sculpture in professionally-lit gallery space. Your photographs need to imitate that experience.
Expect to take 20 to 30 photographs of each piece of work. Ultimately, you’ll pick the best five or six images to include on an online gallery. Include one of yourself at work, and the materials you use to create your work. The story behind how your work is created will fascinate potential purchasers. The more dramatic, the better!
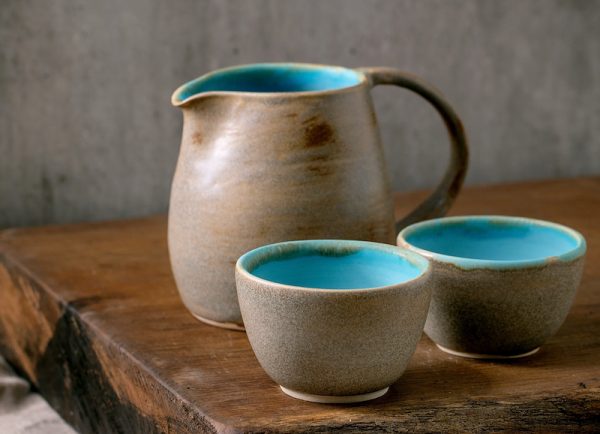
Equipment you need to imitate a professional photo shoot
It’s possible to create professional-looking images at home in your own makeshift studio. A modest investment in equipment, combined with a few household items, some shifting of furniture and a little creativity produces your very own in-home or in-studio photo shoot.
Looking for even more technical detail on how to photograph your sculpture? Check out our guide to photographing your artwork.
A DSLR camera
A digital single lens reflex (DSLR) is a type of camera that allows you to see exactly what will appear in the photograph when you look through the viewfinder. A DSLR camera affords more control over the images you take. Further, you can change lenses for different types of images (such as a macro lens for really close up pictures).
You might be tempted to use the digital camera on your phone. Of course, your camera phone will work as a last resort. But don’t assume you can make all your edits to photos when you upload images to your computer. It is always easier to get the perfect shot from the outset with the flexibility that a DSLR camera provides.
Tripod
A tripod helps ensure sharp, detailed images. Set the height so the camera points directly at the center of the item you are photographing.
TIP: Once you have set the height on a tripod, don’t change it as this ensures every image will match.
Wide angle lens
A wider angle lens is ideal for larger sculptures. For example, with a 24mm lens, you can capture your art along with a background.
Long Lens
In contrast, if you want to show detail, use a longer lens of 50 mm for “tighter” photographs.
Use the aperture to adjust depth of field
On a DSLR, the aperture lets you decide how much light to let into the camera. That, in turn, determines the depth of field (or focus) you achieve with each shot.
The aperture is measured in F-stops, with a lower number representing a larger aperture and therefore more exposure. The higher the F number, the greater the depth of field, and the lower the number the shallower the focus.
To capture detail, shoot with a shallower depth of field. Use F5 for a shallow depth of field, and F11 for greater depth of field. For example, when photographing a face, a lower F number allows you to get the tip of the nose in focus.
When photographing sculpture, effective use of the aperture enables you to focus on texture.
What shots to take
Start off with a list of images you need and tick it off as you go along. We’ve supplied a checklist at the bottom of the article, but you may have additional shots you want to include depending on the sculpture.
Your first shot
When photographing sculpture, always start wide, getting the entire object in the frame in a plain setting. This is what you might call your “just the facts” image.
Establishing shot
With you first “establishing” shot, aim for a flat natural light with very little shadow (think of a bright but cloudy day). Show the front of the image, as well as each side, the top and the bottom. You must let the customer know what they are buying.
From above and below
Not all sculpture sits at eye level. A chandelier, sconce or object on a bookshelf may be situated above you. Give people plenty of diffferent views including from underneath and from above.
Close ups
Close-ups of the surface will reveal your sculpture’s texture or materiality. Is it plaster, wood or metal? Work your way in towards any details, especially those that show your art to best effect. If you signed your work, photograph the signature. If the item is glossy or has a sheen, a more direct light will show it off.
In situ
Next, present the sculpture in situ. Scenes of your art on a dining room table, a bookshelf or as the focal point of a garden will help an art buyer visualize it in their own home. Offer a few shots of alternative places it could be placed.
Don’t forget that interior design is a $660 billion market. People buy art that helps them nest and makes their home feel cozy and infused with personal style.
For more tips, check out our guide for selling more art through interior design.
Creative pairings
Once you have your establishing shots, sit your object with other items. For example, you might position a vase next to flowers, or pair a modern sculpture with antique books. If you are a potter and your work is part of a series, include group images.
Scale
Give the item a sense of scale. Written measurements mean less than an image. Place your sculpture next to another familiar objects that gives context to its relative size. If needed, you can even sit an object next to a tape measure.
Curating the sculpture’s setting
If the sculpture is too big to move and sits in a studio, curate the space around the object. Get rid of clutter and set up a blank background using paper or fabric.
Photographing large scultpures
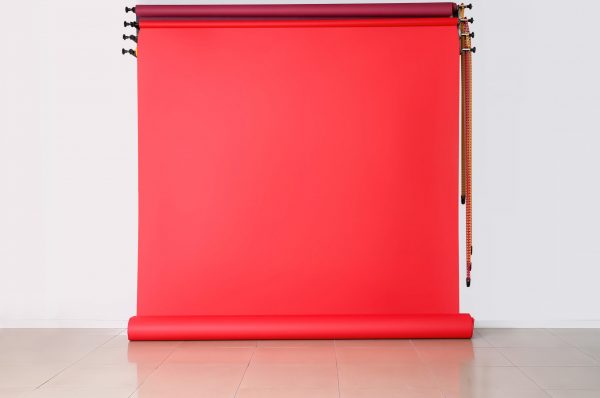
For a large object, you can pin a bedsheet to the wall or space behind the item to create a plain background. To ensure a seamless background, make sure the fabric is crease-free and long enough to sit under the item you are photographing.
Backgrounds
Try a contrasting color. For drama, you might want to go with a black background. But bear in mind that a black backdrop requires good lighting and more advanced photography skills. Conversely, a white background will generally appear grey without professionally lighting.
Lighting
Lighting is a vital part of showcasing the shapes, textures and scale of your sculpture.
At a minimum, your establishing shot should use a flat even light: think of a bright but cloudy day where there is not much contrast (no real shadow).
But once you have captured the basic images, experiment with more dramatic lighting. A sculpture with many different surfaces will look great with exaggerated shadows. These can be achieved with anything from professional lighting to a friend holding a torch (or a mobile phone light) to give a strong single light. Heavy shadow will help to capture density or weight to your work.
TIP: A white background is great for cutting out the background using basic software.
Backlighting
In portraiture, backlighting gives the subject a slight glow, separating them from the background. Think of all those portrait photographs of beautiful screen starlets from the 1940s. The light sits behind the subject, creates a kind of halo effect. Equally, when photographing sculpture, backlight can imbue the subject with three-dimensionality.

Frontlighting
Frontlighting is the more traditional way to light an object, typically using a flash. It’s better to use a light or flash that is not connected to the camera and bounced off something else, such as a wall or ceiling. The indirect approach creates a more defused light.
Using a flash
A flash gives a harsh light with sharp shadows. But try different ways of using it to achieve the desired result. Often, DSLR cameras have a flash that works remotely, or is detached from the camera itself. That allows you to use a flash without pointing it directly at the object.
Should I film my sculptures?
Short 360-degree films can work really well with artwork. Social media channels emphasize videos, which means your reel or the 10 to 20-second shoot can bring in more viewers and potential purchasers.
How to film 3D art
Put your camera on a tripod in a fixed position and turn your sculpture on a lazy susan or turntable. For the film to work, you will need good lighting and someone with a very steady hand to turn the sculpture.
TIP: Remember to size your images for web use. Small images will load quickly without a delay even if there is a poor signal. Research shows people will leave your site if they can’t see the pictures in seconds.
Photographing Sculpture: Checklist
- Wide angle shot of item from far away with a clean background or backdrop. The light should be flat and even and the item should sit near the center of the frame.
- Move closer to the image keep the whole object in frame.
- Use curated sets and backgrounds to create a striking image.
- Capture the object in your studio or with tools and raw materials in shot.
- Photograph the object from all sides, including the top and from underneath.
- Take close-ups of texture, signature and any other details.
- Add dramatic lighting to showcase the shapes and textures of the object.
Creating Eye-Catching Photos of Your Sculpture Doesn’t Have to be Hard (or Expensive)
If you follow these steps, you can DIY your way to professional-looking photos that will ensure your sculpture sells itself.
And, if you’re wondering where to showcase these fabulous images, consider building a free website with Artweb.

