Whether you’re building your art website, printing marketing materials or selling print reproductions, every artists could use a few tips for how to scan artwork.
You could simply photograph your work, but scanning artwork captures far more detail. And there’s always professional scanning services, but those can set you back hundreds of dollars. When it comes to digitizing your art, at-home flatbed scanners offer the best combination of quick, easy and affordable. Better yet, they’re flexible: you can scan drawings,
Images will match your original work and can be printed at a higher quality best suited for printed marketing materials, such as posters, flyers and publicity shots. Better yet, a flatbed scanner is surprisingly flexible: you can scan drawings, a canvas painting, and even large artwork.
What is scanning?
Scanning your artwork means converting your art into digital images. Scanning is an alternative to photographing artwork and gives you truer-to-life results. When using a professional-caliber printer, scanning will create high-resolution art prints that will last without fading and can be sold. You can also use scanned images for marketing, digital and print materials and exhibitions.
With scanned images, you can also create various sizes of your original artwork.
You can pay a scanning bureau or print shop to scan your work with professional equipment, but you can often achieve good quality results with a flatbed scanner at home.

How to scan artwork with a flatbed scanner
You need a flatbed scanner installed and connected to a computer system. Before you get started, it’s worth playing around with the scanner using something less precious than your artwork.
What to consider when scanning your artwork
Always set the size measurement on the software to read in pixels when making a scan, unless you are scanning directly to a printer.
Third-party scanning software, such as Adobe Acrobat, may produce better results than the software supplied by the scanner manufacturer.
Never scan at a higher resolution than the actual optical resolution of your scanner. Don’t use any edit options on the scanner software – for example a “sharpen” command.
Getting started
It sounds obvious, but clean the scanner glass with a damp cloth or glass cleaner and dry it before use. Any tiny mark or detritus will be highly visible. Think of what happens when there is dirt on the lens of a camera. Scanning a blank sheet of white paper and then zooming into the image will expose even the smallest particle of dust or dirt.
Prepare the image and software
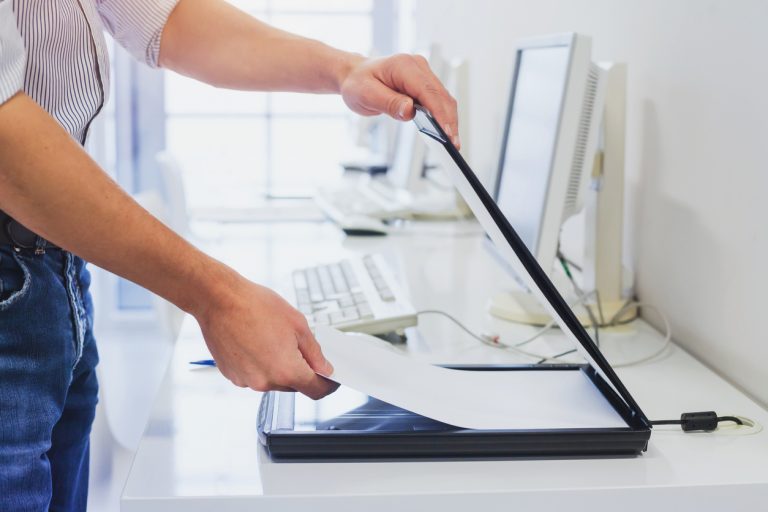
- Put the print, canvas or drawing face down on the glass. You will need to ensure that the actual print area is parallel to the edges of the scanner.
- Start the scanner software. On some scanners there is a scan button. Or, there may be an import function on your images processing software, or a separate scanner program.
- If your picture is skewed, adjust the alignment and repeat the preview.
- On the preview, use the mouse to outline the desired scan area.
Choose color and resolution
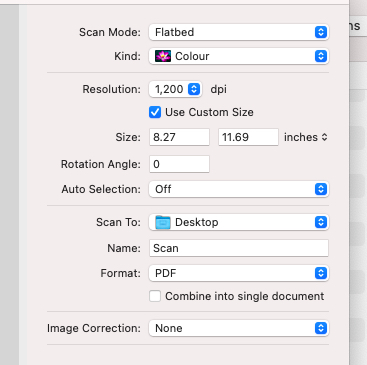
- If you are using Photoshop (or other image manipulation), scan all images as “millions of colors.” Otherwise, use this for color and opt for “grayscale” when producing black and white images.
- Adjust the scanner resolution to give an appropriate file size in pixels. For printing, scan to get 300 pixels per inch of final print size. For web, create a scan with the largest side around 900 pixels.
- Try the auto-exposure button if there is one in the software. Then adjust brightness and contrast if needed. On some scanners, resetting to default will give good results.
- For color pictures, set any color controls to the default values unless you are scanning directly to a printer.
- If your scanner has a setting that allows you to improve shadow separation, use it.
Scan and save your artwork
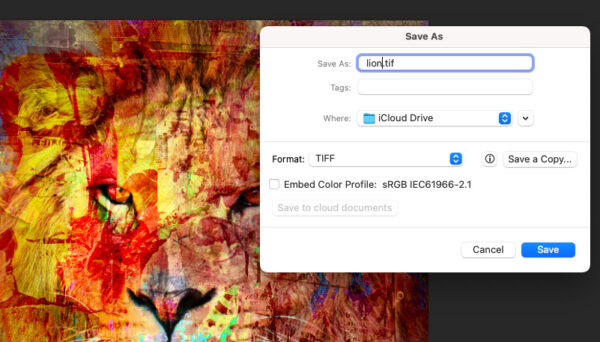
There are ten different file types you can choose for photographs. All have specific uses. For scanned images, save in TIFF (Tagged Image File Format). Do not use JPEG, as it is not a native file format in Photoshop. Photoshop can open and edit JPEGs, but it cannot save images as JPEGs.
How do you scan artwork that is larger than the scanner?
It’s unlikely you will have a flatbed scanner larger than A3 (11.7 x 16.5 inches). Unfortunately, the chances are that many of your artworks will be larger that that. That’s especially true if you favor abstract paintings, some of which could be double or triple the size of your scanner. Your first thought might be to simply photograph the work or resort to a professional scanner. But you can create a full scan by breaking up the work and scanning it in pieces. And don’t worry – doesn’t entail cutting up your work!
How to scan large artwork
You can’t rush an effective scan. Make sure you have time and the space to scan everything. It will be easier to scan larger drawings or canvases if you take the cover off the scanner and place the artwork face down on the scanner.
Based on the standard sizes of canvas and artist papers, you will need to scan two halves or scan one quarter at a time.
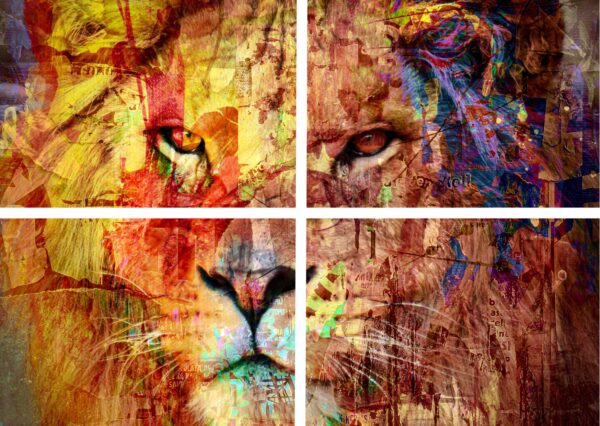
How to scan large art in pieces
- Scan the first quarter of your work at a resolution of at least 300 dpi, but go as high as the scanner allows. The maximum resolution may be 2400 dpi, but it’s higher on some software, so check first.
- Take some time to align the artwork squarely, and reduce the gap between the surface of your work and the scanner plate.
- This is where those great heavy coffee table art books will come in. Weighing down the work will also reduce the chance of the work moving – even a tiny movement can tarnish the focus. Scan the image several times.
Scan the remaining quarters or half using the same settings. Once again, take great care to align the artwork squarely and firmly. Just a small error at this stage will affect the overall image when you edit the pieces together.
Check your images
Once you create the partial images of your art, print them out and stick them together like a jigsaw puzzle to ensure the work has been seamlessly captured. You don’t need to worry about the print quality at this point, although it might help the match. Once you are happy, move to your computer and open up your photo editing software.
You will probably need Photoshop for this stage. It can be expensive, but consider it a great investment. The software company offers scores of video tutorials to familiarize you with the product. Fortunately, you only need to master a few elements of this professional-level software.
Using Photoshop to edit multiple images
Open up each of the quarters of the painting in Photoshop.
Remove canvas pattern
Zoom in and you might find the canvas pattern is visible. You can remove this:
- Apply Filter -> Blur -> Gaussian blur, have the radius at between 5–10 pixels.
- If you scanned at more than 300 dpi, reduce each quarter to 25%.
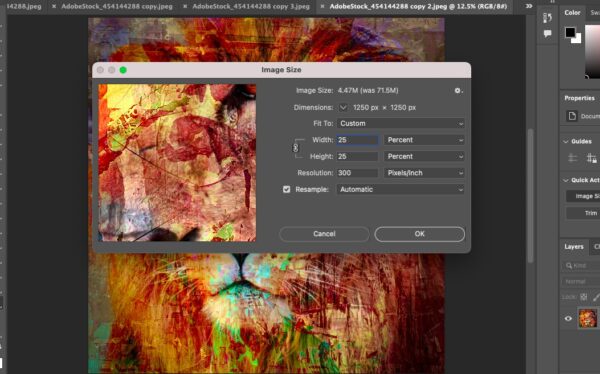
Size the images
Each image will need to be 25% (if quartered) or 50% (if halves).
- Go to Image Size (note: Make sure that Constrain – Proportions box is checked: Image Window).
- Change inches to percentage by pressing the triangle next to the word inches.
- Change width to read 25% (when the Proportions box is checked, both the width and height will be reduced by 25%).
- Press OK.
- If necessary, go to Image -> Rotate, and select the correct number of degrees so that it will be right side up.
Now it is time to put your image together
Set the canvas size
The software will have a default setting of the size of your image. Make it too big and it can be difficult to work with. The bigger the image, the bigger the file size.
- Go to Image -> Canvas Size, change the width to five inches and the height to six inches. This will give you enough room to assemble the painting.
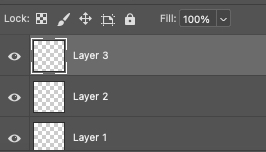
Add layers
Next, add three more layers to the image, one for each of the quarters (or two layers if it is halves).
- Make sure the Layers Palette is open.
- If it isn’t, go to Window -> Palettes -> Show Layers to open it.
- Press the triangle until the menu pops out and choose New Layer.
- Using the Marquee tool, move the bottom left side of the painting to the bottom left side of the screen.
- Copy each of the remaining quarters and paste it into its own layer in your assembled image file. Bring the images together.
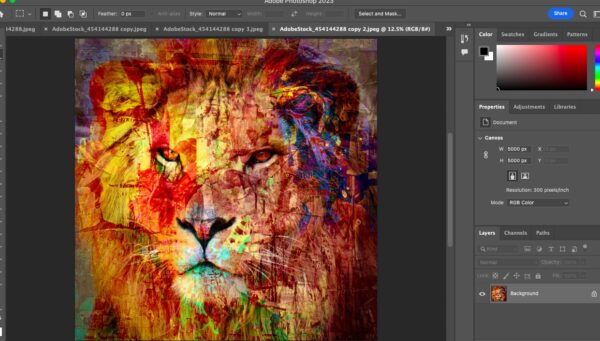
You can now move around each of the quarters until they all match up with each other. To do so, select the layer that it is on and use the Move Tool to move each section by a very small amount. (Tip: You can use the arrow keys).
Create one image
When you are happy that all the quarters line up, go back to the Layers Palette and press the triangle again. This time choose Flatten Image and your quarters will be pasted together.
Now you can handle this image like any others you have edited. Save as a TIFF, not as a JPEG. Later, you can export your file to other types, such as PNG.
A few extra things to consider
You might need to trim your image a little, sharpen it, adjust the colors, or change the size, depending on your intended use.
The process for scanning large paintings or drawings may appear complicated, but once you practice a few times, it quickly becomes easy. But if you still find it too difficult, you may feel it is easier to get it professionally scanned, using professional equipment. See below for more on professional scanning options.
Which scanner to buy
Scanner technology is improving all the time, so it’s difficult to keep current with recommendations. The best advice is to do your research. Start with online recommendations, but ensure the source is reliable and independent. Be wary of reviews and “best of” lists that are simply advertisements in disguise. Most bloggers will reveal if they receive commission or have affiliate links.
There are specialist photography magazines and online expert bloggers that will offer detailed advice on scanners. But you will still need to make sure your chosen model suits your purpose. The main factors to consider are the optical resolution and bit depth, but any new scanner is likely to produce acceptable results. Most will be compatible with different software and operating systems, although it’s always wise to confirm.
Professional digital scanning
The limitation of a home flatbed scanner is often as simple as the almost invisible distance between the piece of work and the scanner itself. Who hasn’t held down the lid or deployed a few heavy books as weights? That almost invisible distance is nearly zero with professional scanners. That infinitesimal clearance between the print head and the substrate (what we might call the scanner plate) is crucial to high quality images and prints.
How to find a professional scanner
Online research will help you identify good professional scanners, but remember they will need your original work, so factor in postage or carrier costs. You are not looking for a mass printer offering leaflets and business cards. Art printing and scanning is a specialist skill requiring quality equipment.
Most art printers will offer scanning services as an extra to printing, so if art scanning doesn’t show up in online searches, try art printers.
A credible professional will gladly provide you with references to past clients before you commit.
What are the options for professional scanning?
These machines are professional level. Buying one will set you back thousands of dollars. Generally, only pro labs require that kind of firepower, so it is hardly surprising that a high-resolution scan can cost $50 a pop. The available scanning size will vary, but professional scanners who are experienced in artwork can also use the partial scanning method detailed above.
Where to go for the best digital scanning?
If you decide to splurge on professional quality scanning, look out for businesses that promote brands like swissQprint, which prides itself on operating as close to the substrate (scanner plate) as possible. If in doubt, contact the printer and find out more.
Once your images are professionally scanned, you can use them for everything from your website to posters – you can even display it on a billboard.
Selling prints
Professional scanning and the ability to create near-perfect copies of your work may open up an entirely new line of business for you: selling your prints. From that perspective, professional scanning might be a worthwhile investment in the growth of your art business. If done well, scanned artworks don’t have to be professionally printed before you sell them. Increasingly, artists are selling downloads of their work — good news for those who want to bypass the scanning process entirely.
For more, check out our guide to reproducing your prints for commercial sale. Or, read our blog on how to market your prints to the lucrative interior design market.
Create a Stunning Artist Website
And don’t forget that pixel-perfect images of your artwork are the backbone of a beautiful artist website and the key to showcasing and selling your art online.
And, if you’re wondering where to showcase these fabulous images of your work, consider building a free website with Artweb.
This post was originally published in April 2011. Last update: February 6, 2022.

