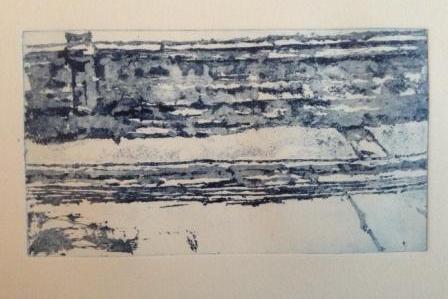
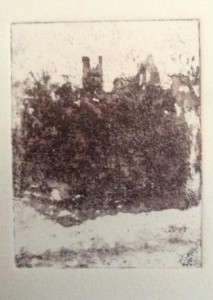
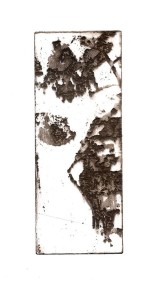
If you find yourself wishing to marry the largely technical process of etching with a more painterly, intuitive style, then you may consider experimenting with the sugar lift etching process. This process, as you might expect from the above, involves the application of painterly marks to an etching plate, with the marks that you create being positive rather than negative.
Preparing the solution and plate
Central to this process is, of course, the sugar lift solution itself, which you can create by pouring about 100 mL of hot water into a screw topped jar and continually adding sugar until it ceases to dissolve. Add a modest amount of black gouache and a few drops of gum arabic to the resultant saturated sugar solution and thoroughly stir, and you will soon have a sugar lift solution that is ready to use.
You will then be able to prepare the zinc plate, initially in the usual fashion for etching—filing its edges and polishing it with metal polish or brasso—before degreasing and rinsing it. Then, it’ll be time for the fun bit of creating the image, which literally involves painting directly onto the plate with a brush and the sugar lift solution.
Once the image is dry, use a wide soft brush to thinly coat the entire plate with straw hat varnish. This, too, will need to be left to dry, before you submerge the plate in a tray of warm water and gently agitate the sugar lift layer with a soft brush to encourage it to lift. With your painted image now exposed, it’s time to move onto the aquatint stage.
Aquatint, then onto the etching
We don’t have a huge amount of space here to go into the aquatint process—hopefully, if you are considering sugar lift etching at all, you will already be reasonably familiar with the technical aspects from past experience of aquatint etching—and if not, we would advise you to consult a suitably qualified printmaking technician.
So, let’s skip over that stage to the actual etching of the plate. This, again, should be familiar to you if you have done a decent amount of etching in the past—albeit, it does have some twists. As usual, you will need to protect back of the etching plate with tape before placing it in the acid bath for ‘biting’, except that with sugar lift, you also have the opportunity to create intriguing areas of light and darkness by ‘stopping out’ certain areas with stop out varnish between biting periods.
Naturally, the exact lightness and darkness of those resultant tones depends on the strength of the acid and how long you have the plate ‘biting’ for—give it 30 seconds and you will probably get a light grey, whereas a four-minute biting time may produce a convincing black. Make sure you don’t over-bite if you want to avoid the complete removal of the aquatint. Once all of the biting is done, use white spirit to remove the stop out varnish, and meths for removing the straw hat and aquatint.
It’s finally time to produce some prints!
If etching is already a staple part of your printmaking practice, you can probably stop reading here, as the subsequent process is very much like any other etching printing, from the preparation of the paper in the water bath and the inking up of the plate to the running of the inked plate through the print press.
Still, for those who aren’t so knowledgeable, we’ll give you some pointers. Your paper needs to be placed in a water bath for at least five minutes before being lifted out and placed between two pieces of blotting paper. Leave it here for long enough to become soft and damp rather than merely wet—and remember to keep your hands immaculately clean throughout this process!
The inking up process is the typical one for etching, with ink needing to be pushed into the etched areas prior to excess ink being wiped off the surface with scrim and the plate finally polished with tissue. This way, when the plate is actually run through the press, it will produce a clear image.
An incredibly painterly end result
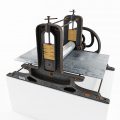
Hopefully, you will know enough about the final printing stage already without us needing to alert you to the basic steps here, which include placing a sheet of newsprint underneath your inked plate, before placing the inked plate on top of that, followed by the dampened paper, yet more newsprint and the replacement of the printing press’s blankets over the top.
Wind the plate through the press bed, carefully lift back the blankets, peel off the plate and survey the results on paper. Aren’t they amazingly… natural? It is certainly a printmaking process that will appeal to the instinctive painter in you, as well as the more technically-minded, but adventurous printmaker.

